I’ve been raising chickens in my backyard for more than 13 years, making my own chicken feed for 12 years, and fermenting it for the majority of that time.
Lacto-fermentation is a discovery I made while trying to give my hens a more wholesome diet, and it’s probably one of the easiest things you can do to improve their health and their eggs (while saving a bit of money at the same time).
In a nutshell, fermented chicken feed is probiotics for your chicken. It’s a wet mash (the chicken keeper’s term for moistened food) created by lactic acid fermentation (the same type of fermentation that occurs naturally in sauerkraut).
Just like kraut, it contains all the bacteria that’s good for your gut: Lactobacillus, Leuconostoc, Pediococcus, and other beneficial bacteria and yeasts.
I’ve been fermenting my chicken feed off and on since I switched to using only whole grains and seeds, and I wanted to go through a 50-pound bag of scratch grains quickly and efficiently.
(Learn from my mistake: Do not buy 50 pounds of scratch if you have a small flock of chickens that forages most of the day. They will peck and scratch the ground regardless, and if you already feed them other grains and seeds, they will simply ignore the scratch you toss on the ground.)
So, how does lacto-fermentation work?
The first day of soaking grains greatly improves their digestibility by reducing the phytic acid and enzyme inhibitors found in all grains, seeds, and legumes.
By the second day, lactic acid bacteria begins the process of fermentation by consuming the sugars in the grains and multiplying in great numbers, producing lactic acid. The lactic acid, in turn, makes the environment unsuitable for bad bacteria, leaving behind only beneficial microbes. This process preserves and enhances food.
As long as the grains stay submerged in their lactic acid “bath,” they will be preserved indefinitely (though there comes a point when the grains can become too sour and thus, not very tasty… just ask anyone who has had over-fermented kimchi).
Why you should ferment your feed
We all know that lacto-fermented foods are good for us; yogurt, sauerkraut, kimchi, and kombucha are among the foods touted for their nutrient-dense and enzyme-rich benefits to our health.
Lacto-fermented food contains live Lactobacillus, a beneficial bacteria that helps normalize the acidity in our stomach, provide digestive balance, aid in the absorption of nutrients, neutralize toxic compounds, and strengthen overall immunity.
But what about for chickens?
According to research, fermented feed has been found to increase egg weight, shell weight and shell thickness; boost the chickens’ intestinal health by forming a natural barrier to acid-sensitive pathogens like E. coli and Salmonella; and lowered their consumption of feed (due to their bodies digesting the fermented feed more effectively), according to a British Poultry Science study from 2009.
Another 2009 study by the African Journal of Biotechnology concurred that fermented feed reduces the level of anti-nutrients found in the grains and seeds, and greatly improves the bioavailability of vitamins and minerals during digestion.
Not only does fermentation preserve the vitamins in your grains, it also creates new vitamins, primarily B vitamins like folic acid, riboflavin, niacin, and thiamin.
In short, fermenting your chicken feed leads to better eggs, better hen health, and lower feed costs. Less feed also means less poop, which none of us can complain about!
Disclosure: If you shop from my article or make a purchase through one of my links, I may receive commissions on some of the products I recommend.
How to ferment chicken feed
Feed fermentation can be broken down into four simple steps:
- Fill a container halfway with feed.
- Add enough (dechlorinated) water to submerge the feed.
- Stir and let it sit for a few days to start the fermentation process.
- Once you see active bubbling, your feed is fermented and you can give it to your chickens.
For a flock of three hens, I use a gallon-size glass jar. Larger flocks may require five-gallon buckets or storage bins, so long as they come with a lid.
If you can only source a plastic container, try to ensure it’s BPA-free. The acids in lacto-fermentation can increase the chances of BPA leaching into your liquid, and while there hasn’t been any concrete studies on how much BPA is actually leached, I’d rather not take my chances.
What to buy
For fermenting chicken feed
For a better visual overview of the process, here’s what it should look like:
Step 1: Fill your container about one-third to one-half full with the feed of your choice.
You want to leave room for the grains to expand.
You can ferment any feed you currently give your chickens, whether it’s crumbles, pellets, scratch, or whole grains and seeds. The higher quality your feed, the more your chickens will gain from lacto-fermentation.
Try fermenting my homemade whole grain chicken feed (I also have a feed recipe with no corn in it), but leave out the brewer’s yeast as that will introduce alcoholic fermentation (whereas we want lacto-fermentation).
Step 2: Add enough dechlorinated water to cover the grains by a couple of inches.
Why dechlorinated water? Because most municipal water—the stuff that comes out of your tap—contains chlorine and chemicals designed to kill bacteria, including good bacteria.
You can use filtered water for lacto-fermentation, or simply set your tap water out for 24 hours to allow time for the chlorine to evaporate.
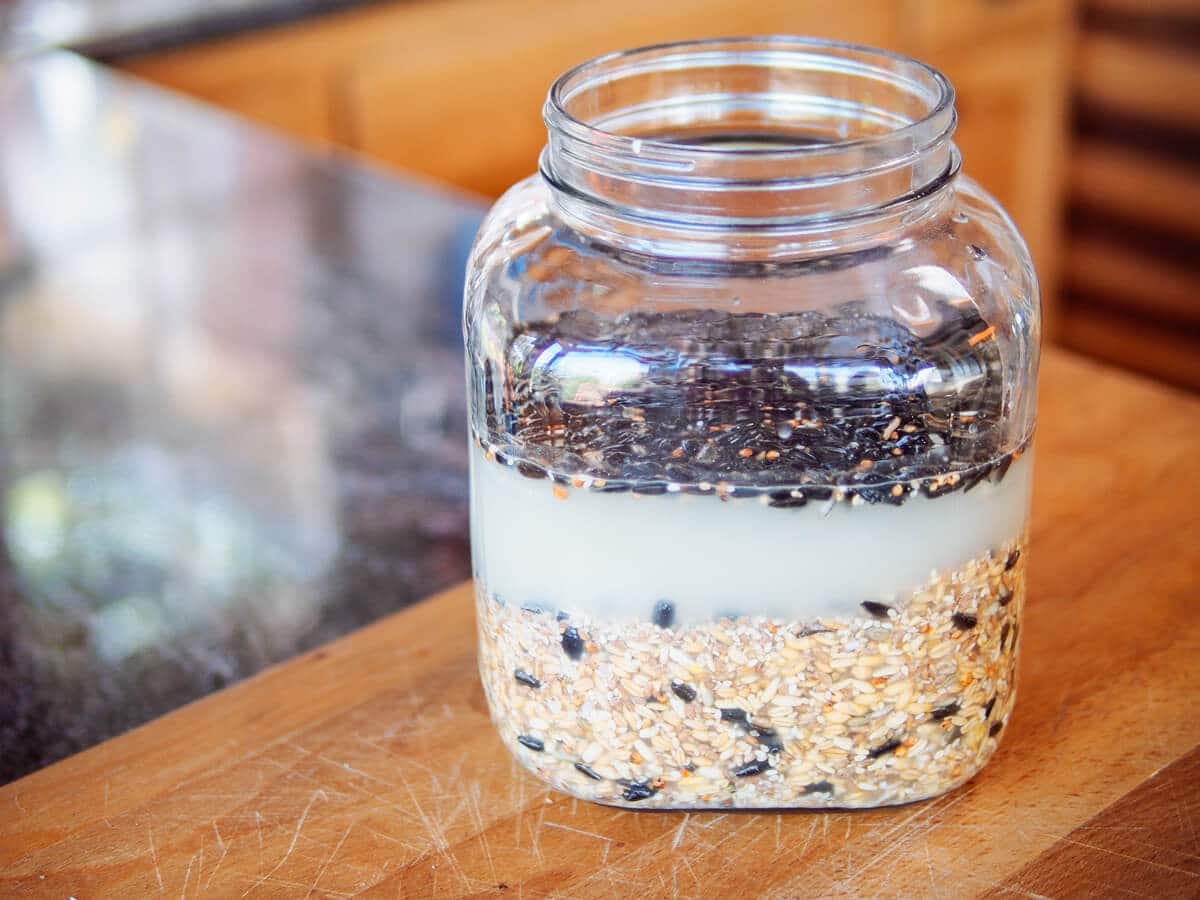
Step 3: Place a lid on your container and leave it out at room temperature for three to four days.
At least once a day, or whenever you remember, give the grains a stir and add more water as needed to make sure they stay submerged.
When you start to see a layer of bubbles on the surface of your liquid, voilà—you have lacto-fermentation in process. The bubbles are the off-gassing of carbon dioxide by lactic acid bacteria.
The water will appear cloudy and the top layer may seem filmy and foamy, but rest assured these are the normal effects of all that bacteria at work. You can simply stir the “scum” back into the feed when you see it.
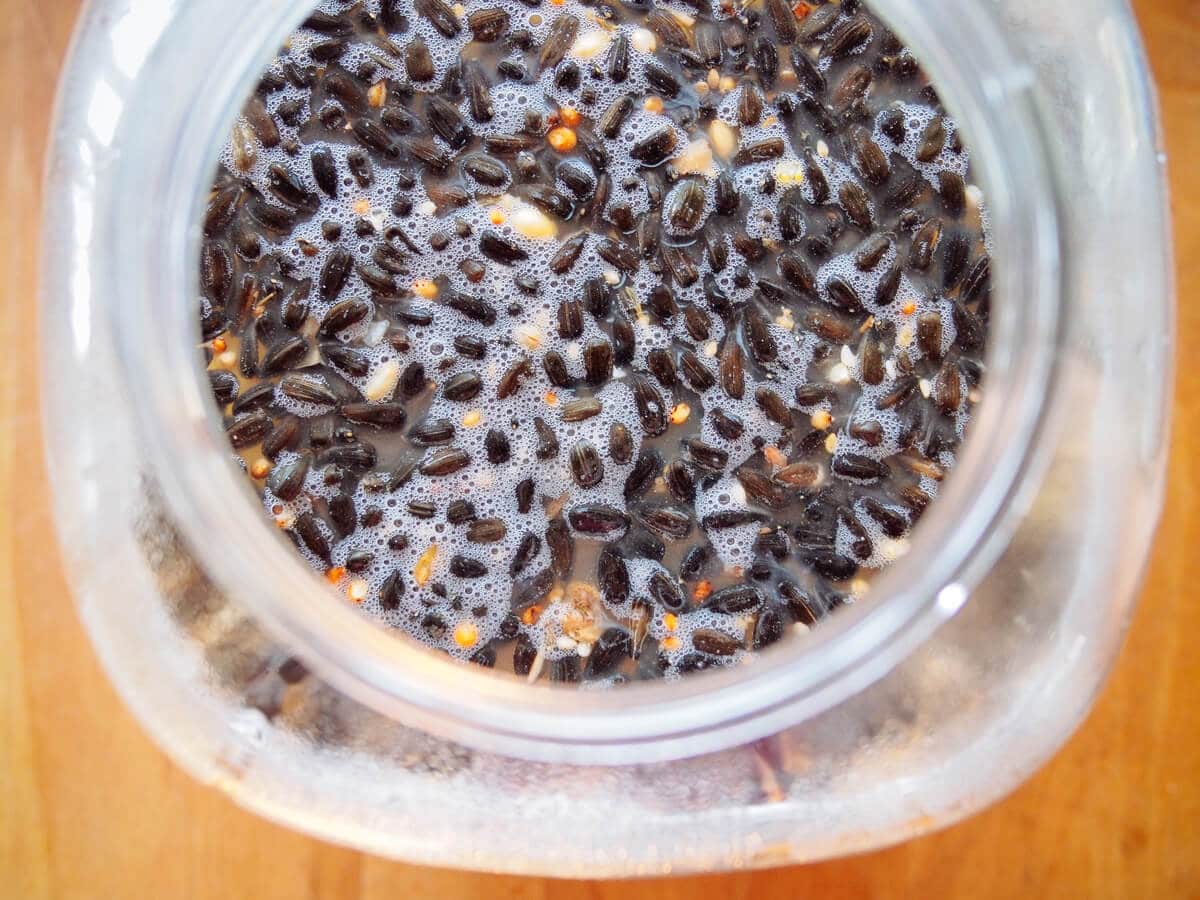
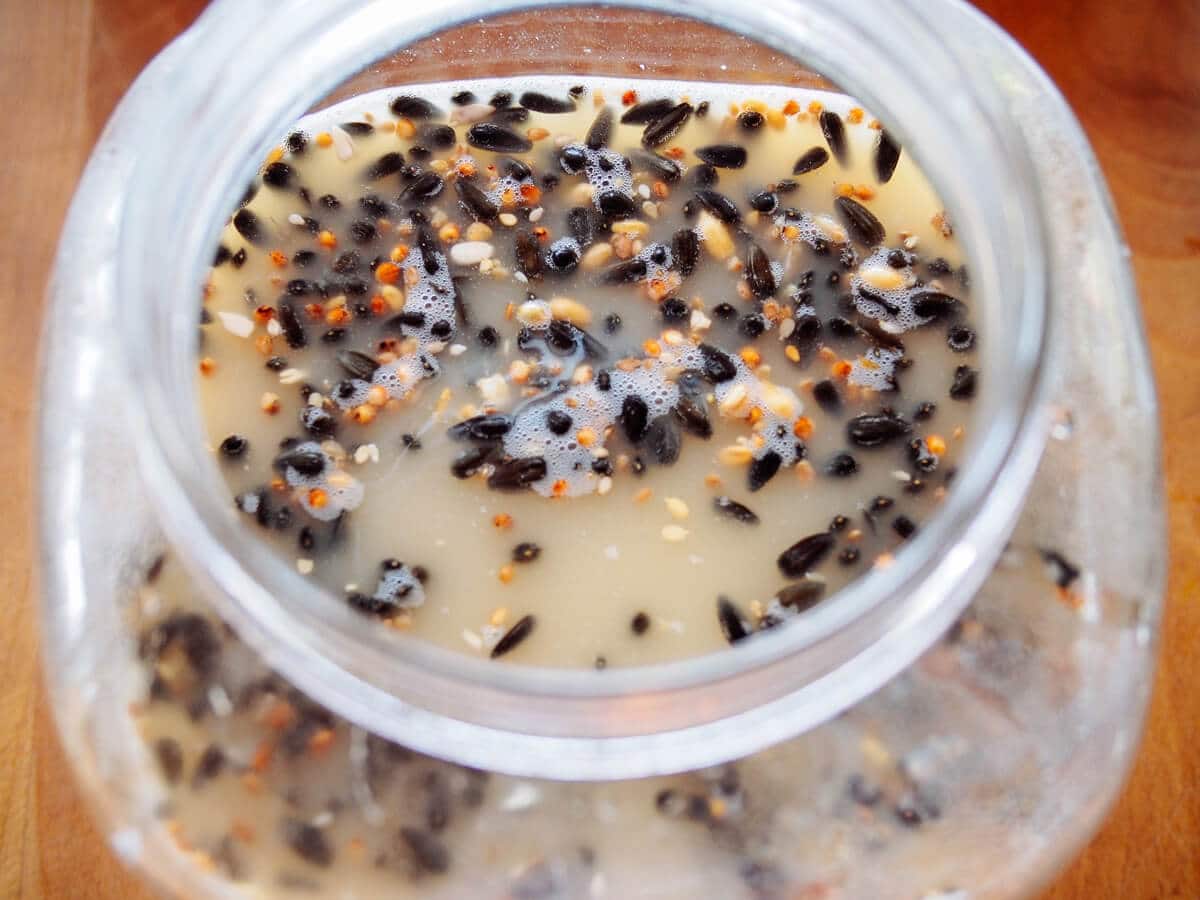
Properly fermented feed actually smells pretty good (if you like fermented food, that is)—fruity and tart, like yogurt. That sour smell indicates the presence of lactic acid.
If your fermented feed has an unpleasant odor, or smells strongly of alcohol or yeast gone wrong, your batch has likely gone bad. A rotten smell means you should discard the grains and start over again.
Quick Tip
Does your fermented feed smell alcoholic? Act fast—you can try to save your batch. Just add a tablespoon of unpasteurized apple cider vinegar (for every gallon of fermented feed) and let the acetic acid in the vinegar digest the alcohol and yeasts, thereby bringing everything back in balance.
You should never see mold in your fermented feed. Mold on your grains is a sign of air exposure. And moldy anything is no good, unless it’s cheese.
When you have mold, it means the oxygen in the environment is depleting the Lactobacilli in your lacto-fermentation. Always make sure your grains are completely covered in water and your container is sealed properly.
Step 4: Feeding time!
In three to four days, your feed should be fully fermented. Check by bubbles and by smell.
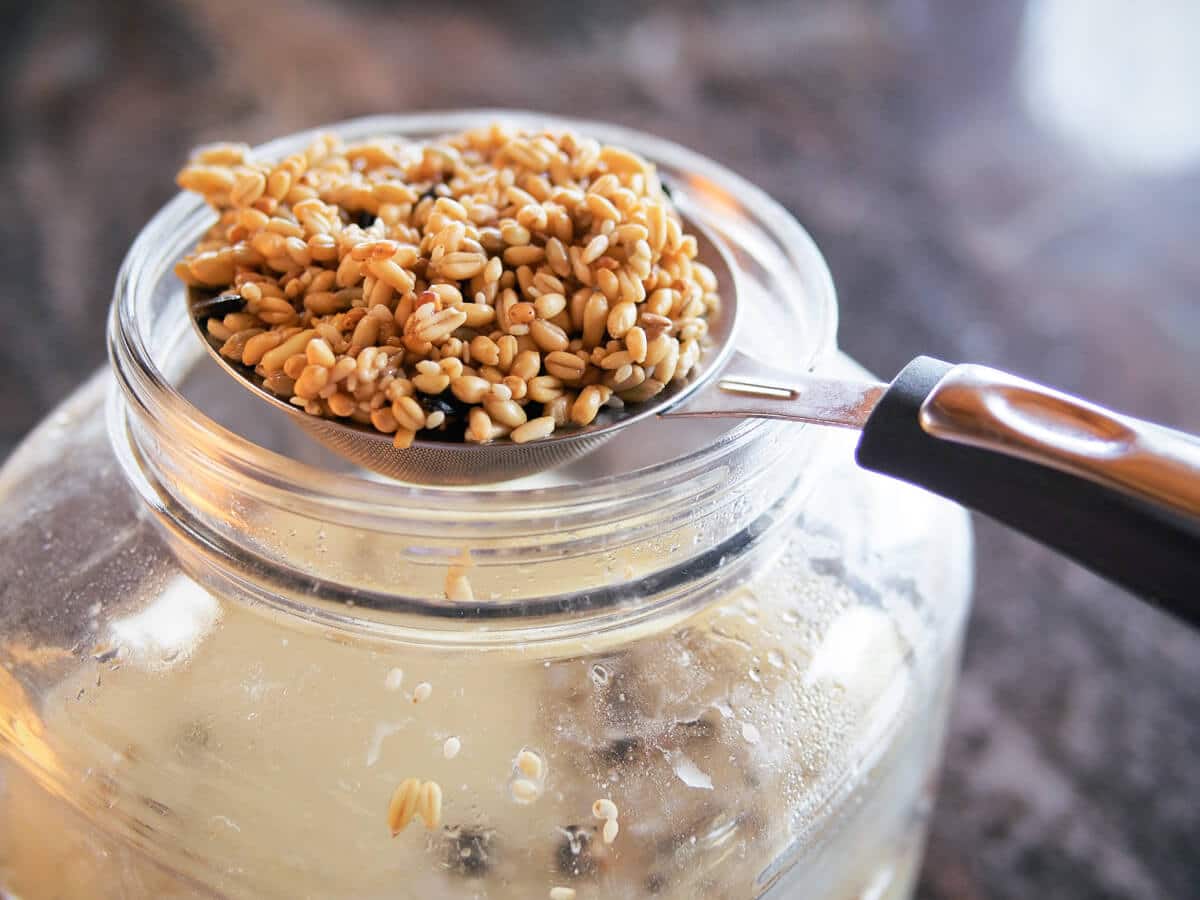
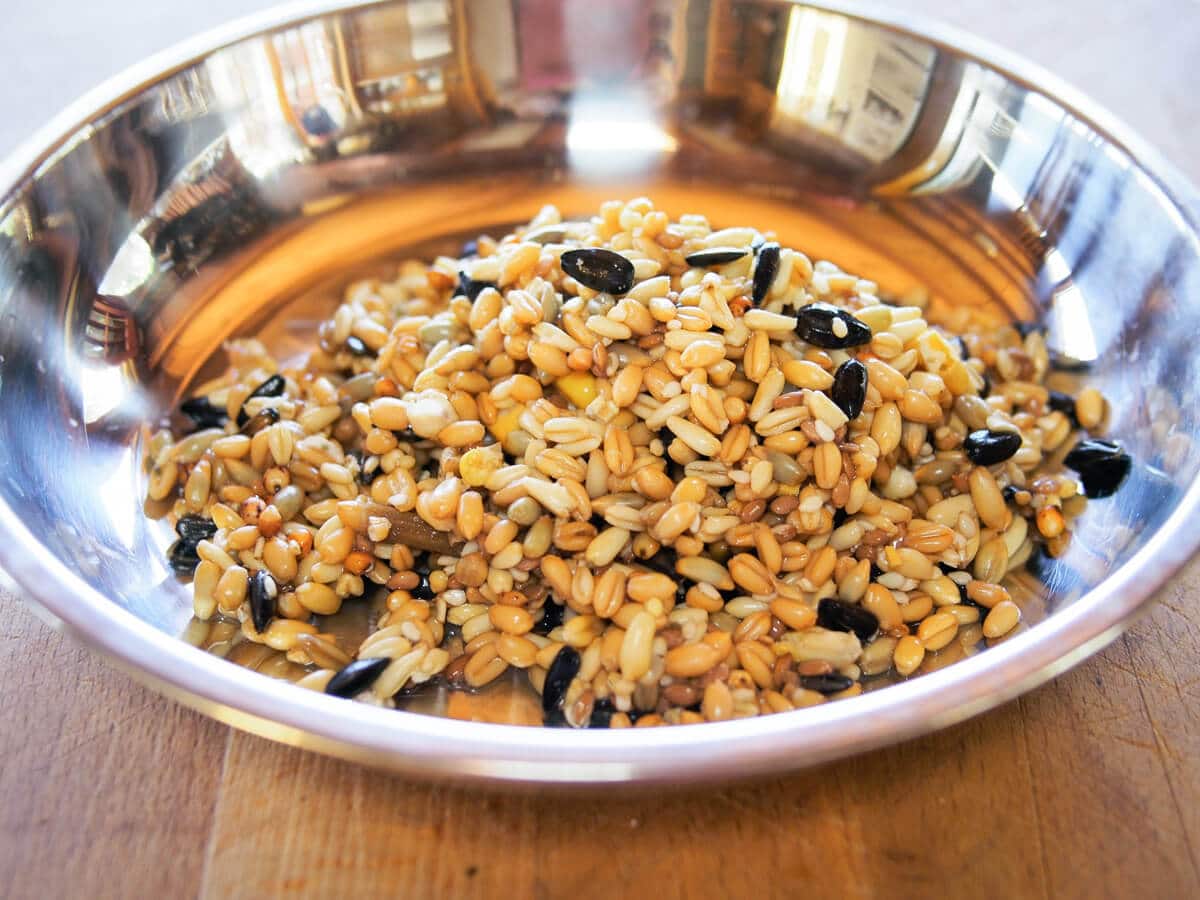
When it takes on a strong and sour smell, you can scoop out and strain the appropriate amount of grains for your chickens and feed it to them wet. Watch them go crazy for it!
Keep it going indefinitely
Every time I strain an amount of fermented feed from my jar, I add the same amount of dry feed back into it.
Give a stir, re-cover with a lid, and strain more feed the next day. This is the easiest way to keep your lacto-fermentation going without starting over.
You can keep reusing the same liquid, especially since it already has all that good bacteria floating around in it, which speeds up the fermentation of new grains.
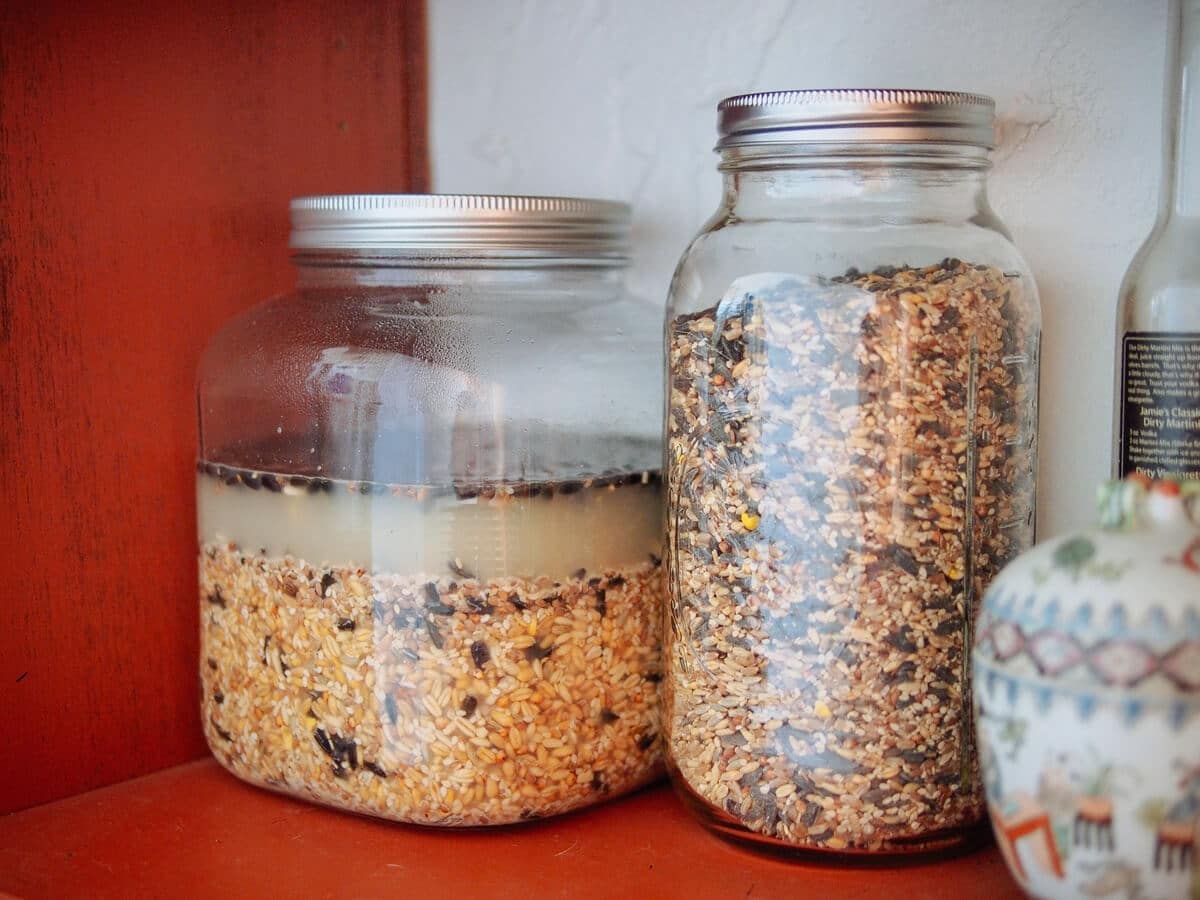
In my setup at home, I keep a jar of pre-mixed grains right next to my jar of fermented feed. This makes it simple to refill the ferment jar with new grains each time I scoop some out of the liquid.
The jars sit on a dark shelf in my kitchen, where the temperature typically hovers around 68°F to 70°F.
What I’ve learned after several years
In theory, you can reuse the ferment liquid indefinitely and it will just get better and better (and by better, that means it will contain an amazing amount of probiotic bacteria).
But I start new batches of fermented feed a few times a year, usually when I go out of town for at least a week and don’t want the feed to turn too sour.
If, after a long period of time, yours becomes slimy, sludgy, or stinky (a side effect of oxygen killing the good bacteria and introducing the bad bacteria), you should start again with fresh water.
I have never used a starter to start the lacto-fermentation, and you don’t have to either. Lactobacilli is already present in the air and on the surfaces of the grains, and in the right environment they’ll proliferate before you know it.
At most, your feed will be fermented by day four. I’ve read accounts from other people who add unpasteurized apple cider vinegar as a starter, but I think it’s unnecessary.
Vinegar contains acetic acid bacteria. We want lactic acid bacteria. While acetic acid has its own health benefits (and certainly won’t hurt if you decide to add a tablespoon or so to your chickens’ water or feed), it’s not useful as a starter for lacto-fermentation.
If you’re really impatient and want to get going right away, you can use the liquid from lacto-fermented pickles or sauerkraut to start your fermentation.
At feeding time, I bring the chickens a scoop or two of fermented feed and clear the dish when it’s empty.
I don’t leave fermented feed out for hours or days at a time, as the bacteria is most beneficial when it’s served fresh. Only leave enough feed out that your chickens can finish within half an hour.
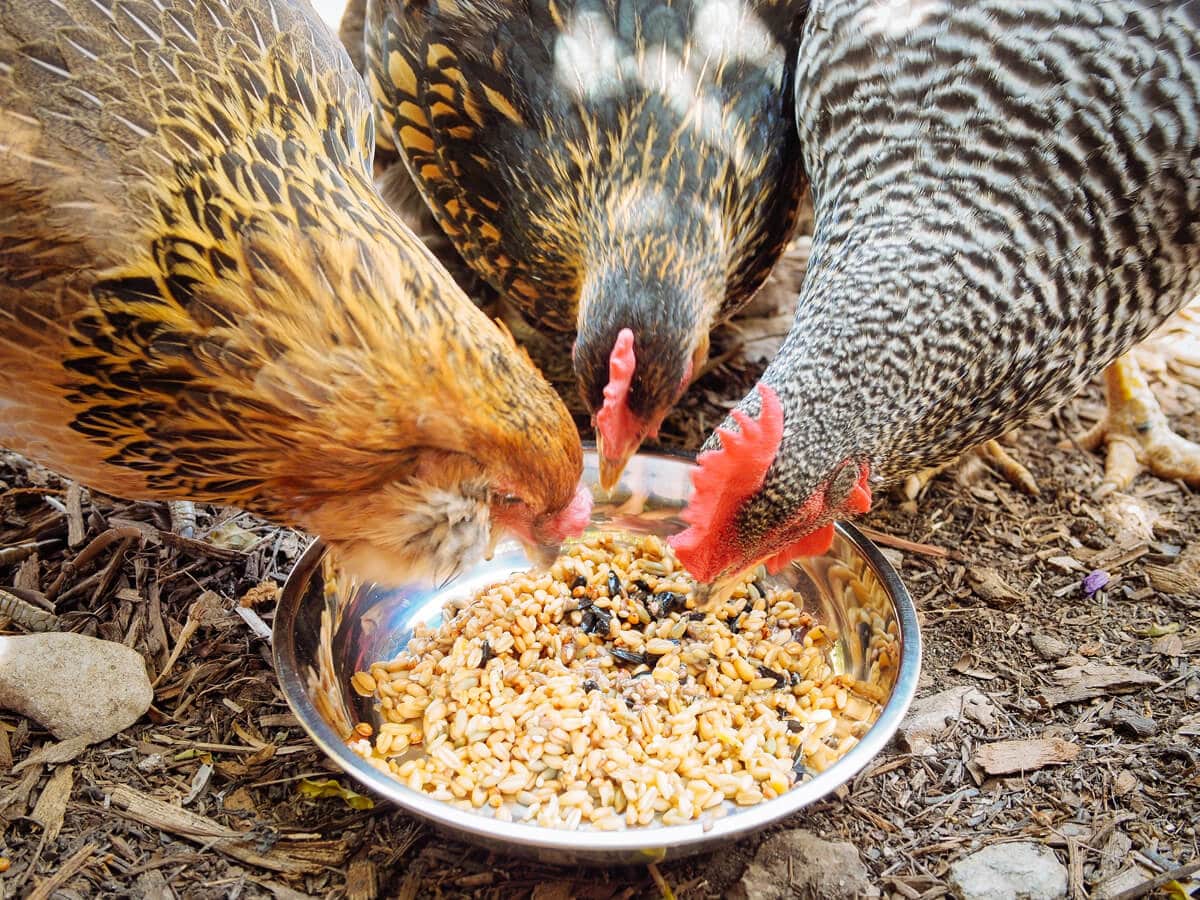
When I confine my chickens to their run all day (no foraging or treats), I’ve estimated that each one eats about one cup of dry feed per day.
When I give them fermented feed, it seems they eat half that amount. At the end of the day, their crops are nice and full. While this is no scientific study on how much less they’re eating of the wet versus dry feed, I think it’s safe to say they do eat less feed when it’s fermented.
I don’t give fermented feed to my chickens every day. This is mostly because I’m not always home, and lack the time and resources to bring them fresh feed every day. But I also believe in balance when it comes to food.
While I’ve yet to come across any reports of someone getting sick from consuming too many probiotics, I feel moderation is best. Most of us don’t eat fermented foods as our main course every day, and our chickens probably shouldn’t either.
I still provide fresh greens and dried grubs or mealworms (along with grit and oyster shells) when I give my chickens fermented feed. I still provide their regular dry feed (as a free-choice option) a few days a week, especially when I go out of town.
I’d say that they average half a week with fermented feed and the other half with dry feed. Since I started fermenting my feed, I’ve raised several generations of chickens (of various breeds) in two different climates, and they’ve all been as happy and healthy as can be!
This post updated from an article that originally appeared on May 27, 2013.










Larry Peitersen liked this on Facebook.
Georgette Howington liked this on Facebook.
Rhonda Sisbower Southard liked this on Facebook.
Denise Junk liked this on Facebook.
Nell Wade liked this on Facebook.
Esther Van de Klundert liked this on Facebook.
Tina Meade liked this on Facebook.
Tina Roe Brooks liked this on Facebook.
Aileen Brown liked this on Facebook.
Thanks for posting this! I have been following your recipe and fermentation method and my chicks love it! I have a tip that might be of help: I use a 1 gallon paint strainer bag (available in most paint stores/departments) to soak my seeds in. It keeps the seeds submerged and makes them really easy to remove from the liquid. I just tie the bag shut with a rubber band, drop it in the liquid for a day or two then fish it out when it is feeding time. EASY!
Just be careful of the type of material the paint strainer bag is made of. Sometimes they are nylon, which is like plastic.
I was wondering if you sprinkle the brewer’s yeast on top of the fermented feed since this is in your recipe. Also you mentioned that you do not feed this every day. Many sites I have been researching do feed this type of feed everyday? Is there a problem with feeding everyday? I have been feeding everyday and also keep your dry recipe in the chicken feeder. Also, where did you get those great looking metal bowls.
I do not add the brewer’s yeast on top (just an extra step I’m not worried about), though you certainly can. I only use it in my dry feed.
And there’s no problem with giving fermented feed every day. I just prefer to vary their diet and since I’m out of town often, there’s usually a week out of the month where they get dry feed. The rest of the time I ferment their grains. It seems like you give your flock a choice so that works too.
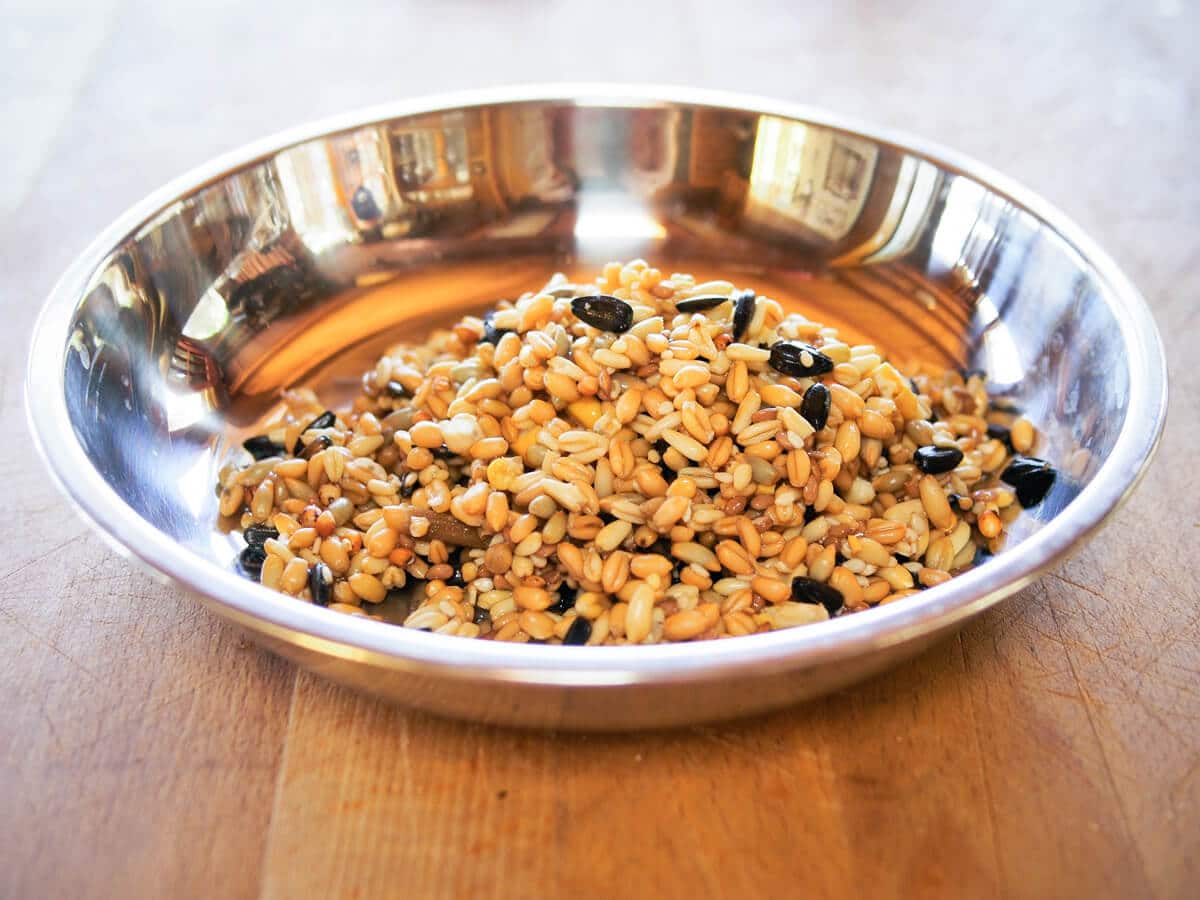
Those metal bowls are just generic bowls that you can probably source from a commercial kitchen shop. Here in California, you can find them in almost any large Asian supermarket in a myriad of sizes, and also at Daiso (the Japanese dollar store). I love them!
Thanks Linda, I do vary their diet with all sorts of fruits/veggies, greens, meal worms, etc. I was planning to keep the dry out and then give them the fermented when I can if daily. I live in Calif. as well and have a big community of Asian stores so I will look there. Having them tilt over is the key, making sure they are sturdy enough. Also I had another question about using chia seeds in your chicken feed calculator. Do you think this would be good for them? Lastly what about fish meal added in? I noticed some of the organic layer feed has fish meal included. My chickens like the lentils but they leave the split peas, not liking them so I am trying to find a substitute that is high in protein like the split peas. Thanks again for a wonderful site.
Chia seeds are a great ingredient to include in their feed if you have access to it. As for fish meal, it’s not needed for my recipe because I get the protein elsewhere (sunflower seeds, kamut, legumes, etc) and I give dried mealworms as treats. My chickens also get animal protein from their daily foraging for bugs.
New reader! Please clarify a couple things for me. I’ve only been fermenting for a couple weeks. Found directions on another site before reading yours. That site never stressed covering the container or keeping container in a dark environment. So I’ve been fermenting using 3 glass bowls on my countertop. I keep seed covered with water and stir several times/day. Other site also said to serve feed anywhere between day 3 and day 5, starting a new batch with some of the liquid from a previously fermented batch, so I’ve been using some of the day 3 liquid (my feed day) to start another batch and let the chickens have the leftover liquid with whatever scraps I have on hand. Couldn’t bring myself to toss it out, but didn’t know I could use ALL the liquid as a starter. Do I really need to cover the container and keep it dark? If I have to cover, can I use plastic wrap? I just bought the bowls especially for this purpose. *sigh* Thank you so much!
The reason the bowls should be covered is to keep out flies and other insects that love to land in food and lay their eggs. An uncovered bowl is a breeding ground for maggots. It doesn’t have to be airtight, so even a plate placed over the bowl is sufficient. As for darkness, fermented foods should always stay out of direct sunlight. UV rays kill lactic acid bacteria (the good bacteria that ferment your feed) and the resulting heat can also raise the temperature of your fermentation too much.
Thank you! Will make adjustments.
This is not true fermentation. This method would still allow bad bacteria because it’s not anaerobic. If this was for human consumption, you would be introducing bad bacteria into your gut.
While the ingredients are different, this method of fermentation is similar to how I make sauerkraut, kimchi, mustard greens, salsa, and hot sauce (all recipes found on this blog).
Under the layer of water, surely it is anaerobic?
Hi Linda,Great info,going to try this.Was wondering if I can use the rainwater out of my garden water butt?
I wouldn’t recommend it. Use only filtered water that you would drink.
Hi Linda,Is it possible to ferment bread to feed chooks ?We have access to day old bread from the bakery,but the girls get tired of bread quickly.Maybe fermenting it might make it more edible.
Yes, you can ferment bread along with your grains and seeds.
I used to ferment rice (for human consumption), however everyone who did so only fermented it for up to about 24 hours and (if re-using the same liquid) after about 4 times it would have a pleasant sour smell by 12-24 hours. Wouldn’t it therefore be best to only ferment it for 24 hours max as after that I suspect the ferment will begin to rot. (sourdough similarly only takes 12 hours, going further than that is not recommended). Generally when re-using liquid, the bacteria are strong, active, and get the job done quickly (the first few times the amount of time you stated is reasonable however.)
The first soaking takes a few days depending on the ambient room temperature, but yes, after that the liquid is active with lactic acid bacteria and fermentation happens quickly. The grains don’t rot if they’re left to ferment longer, however; they would just become more swollen, soft and sour. Rot in a fermentation indicates the presence of bad bacteria.
Personally, I don’t reuse the liquid more than a handful of times because I keep the jar in my kitchen, and the smell does become too strong after a while.
First of all I must say THANK YOU! I read what felt like a million different feed recipes and finally decided to use yours and ferment it. I’ve had more trouble with my little flock but absolutely none of which had anything to do with feed, thanks to your research and time. 🙂
I wanted to share an article I can across in case anyone has had the same trouble I’ve had with the mystery white film on the top of their ferment. It doesn’t look like mold but does cause my ferment to have a stronger less pleasant odor. Not smelly but stronger than my little kitchen can handle. I read through your comments numerous times trying to see if anyone had asked about it. Anyway, apparently it a harmless yeast called Kahm. This article has pictures that confirmed that it was definitely what I was experiencing. Anyway, hope it helps someone, and I hope I didn’t somehow miss this being covered already. 🙂 Thanks again and I am very much looking forward to getting a copy of your cookbook!
http://phickle.com/index.php/the-wrath-of-kahm/
Thank you for the link! And I hope your ladies are liking their fermented feed!
Great article! I have a flock that presently consists of 10 hens, a rooster and 13 babies of 6 weeks +. I feed my babies chick starter in the brooder but the chick starter is a) medicated and b) expensive! I can’t buy any of the layer feeds due the calcium content, and there are NO all flock feeds available around here, so I’m stuck with crushed grains and free choice calcium. I wanted a way to provide a more nutritious feed and this looks like it!
I intend to use a large plastic bucket due to the size of the flock, and plastic buckets can easily be drilled to accommodate a bung and airlock, which I already have. This should eliminate the need for stirring – which seems like a bad idea as you’re going to introduce more oxygen this way from the room air. I lactoferment food for the family and it is never stirred, but the floating bits are kept under water by a cabbage leaf and stone – possibly not ideal for a bucket of chicken feed, but you could adapt that.
What about adding alfalfa hay to the mix? I have a big bag and we’re in that time of year where grass is in short supply. It’s common for fermented feed to be fed to cattle around here over winter (there are no factory farms here; all cows free range) in the form of silage…impressive stuff once it’s all shrink-wrapped in massive bales, a truck dropped a bale through the window of the local hairdressers, lol.
I don’t have any experience with fermenting alfalfa hay, but I would assume you could simply chop it up to ferment with your feed. It would definitely retain more nutritional value than allowing the alfalfa to dry.
Mine seemed to be doing OK, but it started smelling really skunky. I was advised to dump it out and start over with some raw sauerkraut juice added as a starter culture. That started growing a film of white fuzzy mold on top of that water, which is even worse than the skunky smell! I use a glass crock on my countertop for the fermentation, and keep a layer of a couple inches of water over the top of it. What am I doing wrong? Or was the skunk smell even a concern to begin with? It was getting pretty pungent. I’m wondering if it was exposed to too much light/heat…??
It’s also warm here, with the temp inside the house going up to 80 during the day, and lower at night, sometimes down to the lower 60s… maybe it needs a more constant temp? Thanks for any help you can offer with this!! I haven’t been able to find much info online but don’t want to give up on fermenting yet. My girls were loving it even with the skunk smell.
Skunky, to me, means a sulfurous smell, which fermentation should not be. But the longer it’s fermented, the stronger the smell will be and it’s a lot more noticeable in warmer temps. Even at its most pungent, I’ve always thought of the smell as extra tangy; if it smells like rotted garbage, something definitely went wrong.
Raw sauerkraut juice only speeds up fermentation, so it’s not needed unless you live in a cold climate and don’t want to wait the extra couple of days.
White mold is harmless (and odorless) and means lactic acid bacteria is present, but has been exposed to air. Keeping your grains submerged in liquid will solve that issue; so does stirring it up every day (or even twice a day, if your ambient room temp stays above 75-80F).
Your fermented feed should always be kept in a cool, shady place as it’s a living organism. Too much sun or heat will disrupt the balance of bacteria, causing bad bacteria to take over (which is why it might smell putrid).
Hey Linda!
I have been fermenting my chicken feed for a few weeks now. This past week, I added brewers yeast and garlic to the feed before reading on your blog that you shouldn’t. They ate it any way though. I am going to leave it out from now on, obviously, but I was wondering what the effects are to the chicks with it in the feed?
Brewer’s yeast produces a different type of fermentation that can turn your feed alcoholic. If you use it up fast enough, however, that shouldn’t be a problem.
Hi Linda, I’m experimenting with fermenting and sprouting and wonder if you ever tried to ferment your homemade mix containing lentils? I read that legumes start to smell very strong if being fermented and are not cooked before? Did you have similar experiences? Is it safe to ferment raw lentils? Thank you for any advice 🙂
My chickens no longer like raw lentils, so they’re not a part of my fermented feed. I don’t know if lentils smell any more intense than other grains/seeds/legumes when they ferment, but it is perfectly safe to ferment them raw. (You can ferment cooked lentils as well, but I find the double process unnecessary. My girls actually love cooked lentils, so I occasionally serve it to them warm.)
cool, thank you!! Mine love lentils sprouted, but don’t seem to be keen eating them raw. Fermented could work as well, I’ll try!!
I have not fermented the “girls” grains, but have added my kefir milk and kombucha, both home brewed, once a week as a treat. They love it. I will have to try grains, and add it to all my other cultured foods I make for myself.
Your concern about overfeeding fermented isn’t entirely accurate; there are studies that have shown an exclusively fermented feed diet in chickens is more beneficial than using it as a supplement. Microvilli in the gut that absorb nutrients increase dramatically when the diet is mostly consisting of fermented feed, and foreign diseases are completely out-competed.
Good to know. Right now my hens mostly eat fermented grains, but eat unfermented grains when I’m away as I just leave it for them in their feeder. They’re healthy and happy either way!
I want to start fermenting my chicken food. I have organic layer pellets they eat right now so will start with that. Would like to switch to the recipe you have here on the site eventually. One step at a time.
My question is can I use a 10 gallon crock pot to ferment, and keep the pot outside under my back deck. Does it need to be indoors? I could ask my wife about keeping it in the kitchen,…. but at 10 gallons it is huge. I have 6 birds.
Fermentation needs to occur in a dark area where the temperature stays between 65-75F, which is usually inside the house. Outdoor air temps tend to fluctuate too widely. If you only have 6 birds, I recommend fermenting a smaller amount at a time so you can keep the vessel indoors.
Great article, but one point has me confused. You stress the importance of keeping the feed submerged under water, and I have read this in other places, ie that the fermentation needs to occur in an anaerobic (without oxygen) environment. But in your photos I see sunflower seeds floating at the top of the jar? I tried fermenting a batch of mixed grains once, but the floating seeds made me nervous so I ended up just soaking overnight and feeding it. Can you please clarify what’s happening? I’m thinking that perhaps the sunflower seeds are not actually fermenting, but rather just doing early stage sprouting? And I expect most of them would get skimmed off the top for each day’s feeding, thereby avoiding the mold issue?
The sunflower seeds naturally float because of their light weight, and I mitigate this by stirring the grains up once or twice a day (when I feed my flock). If left on the surface like that, yes, they will start to form mold. But since they’re constantly being resubmerged, they still ferment with the other grains. Just make sure you don’t leave your fermented grains unattended for more than a few days at a time, and that you push any grains (that may be stuck on the sides, rim, etc.) back into the water after feeding.
Ive read numerous other sources that say, as you do, to mix the feed a couple times a day, BUT they claim it is NOT necessary to keep a layer of water over top of the feed, this seems born out by your own comment here, as mixing the feed would also result in keeping it all moist..this would seem particularly important if you are fermenting a pellet type feed, as keeping it so soupy that you have a layer of water on top would result in a complete mess, i would think, you couldnt strain out such a concoction as you do your whole grains. What do you think? Caveat, i am simply reading many many sources trying to learn, i have no dog in the race, as i have not yet closed on my farm and thus have no chickens lol.
Exposure to air leads to mold, which is why the grains should be submerged in water where the lactic acid bacteria can preserve them.
I’ve had no experience with pellet feed, so I don’t know how “messy” it would get during fermentation. I’d assume it just turns into a wet mash that can be scooped out.
Thank you for clarifying this!! I have also been wondering about the sunflower seeds floating to the top and couldn’t find a good answer anywhere. You are a wealth of information!
Thanks for this Linda youre wonderful..Cheers.
Just heard of sour mash feed this week. Previously I had fed fodder for relatively good results. Looking forward to implementing this method. Thanks for your time putting this together!
You’re welcome, and good luck!
Anne Kachmarek
Wow thank you I found the best DIY fermented feeds tips and how to’s. I’ve reaserached a lot of how to’s on fermenting feeds, but so far yours has been the most easy to follow. Can’t wait to try it later. 🙂
Thanks and good luck with it!
What grains EXACTLY are you using? Is their a online link to where I can purchase these grains? I am very interested in fermentation of grain for my flock s and the grains you pictured look very good. Is their a place I can purchase them. I usually buy my feed online because where I live their is not much choice of chicken feed. I’ve just ordered a new organic feed I’m wondering if I can ferment that when it arrives? Thank you for your help
.
I got most of my grains and legumes at Azure Standard http://www.azurestandard.com . I am making my own feed based on Garden Betty’s recipe and fermenting it, but you can ferment the already made organic feed also.
Just follow the links in the post above to my chicken feed recipes (with or without corn). The recipe posts also have more information on where I source all my grains.
Just made my first batch of fermented feed- it went fabulously! Chickens ate it in about 30s this morning 🙂 Thanks for the directions!
Awesome! I’m happy they enjoyed it!
Would you use the same formula for baby chicks? Or alter the ingredients?
I just replied to your comment on the corn-free chicken feed post, but in short, you would need to increase the protein of my recipes to 20-22% for your chicks (read the comment thread on http://gardenbetty.com/2012/06/garden-bettys-homemade-whole-grain-chicken-feed/ for ideas on how to do so). But you can ferment them the same way.
Thank you!
Kind regards,
Cathy Moore
Fermented chicken feed – what do you think?… http://t.co/dKPSLN2csq
be aware that some municipalities, mine for example, use chloramine in the water. It is similar to chlorine except that it does not off gas. leaving out will do little to remove the chloramine in your water. Charcoal filtration is the simplest answer.
Good tip!
Hi there. You say to leave out the brewers yeast–but do you add in the kelp granules? Should I add them in before or after fermentation occurs? Also, do you add in the brewers yeast after fermentation before feeding?
Leave out the brewer’s yeast, keep the kelp granules. The kelp is mixed in with the whole grains like normal and gets fermented right along with them. I never put brewer’s yeast in my lacto-fermented feed.
I have done a lot of reading on fermented food and plan to use it for my chickens when I get them in the spring. The one thing I keep reading is never use metal dishes for the feed.
Here is another good ‘article’ thread on Back Yard Chickens forum.
http://www.backyardchickens.com/t/645057/fermented-feeds-anyone-using-them
You shouldn’t store your fermented grains in a metal container, but feeding them out of a metal dish is fine since you feed it to them fresh (and presumably change the dish every day).
A well presented, clearly written and informative article. I have been feeding sprouted organic triticale for over a year now but am thinking of alternating with fermented feed
and I have a lot of freebies of grain mixes from my local organic shop
so I think it would work really well. All the best from Normandie,
Pavlovafowl aka Sue
Thanks, Linda 🙂
Great article, I just started from now using your fermenting method – thanks very much for articulating it so well.
Thanks, and good luck with it!
I have a question– do you not just leave food out for your chickens? It seems like you are giving them individual meals. How do you calculate how much to give per bird. I have 17 meat birds and 20some “pet” chickens. I am looking into switching to fermented feed. PS- I love your blog! Thanks
I leave dry grains in a feeder if I’m gone all day, but if I’m home, I feed fermented grains once a day (and served in a dish, since it comes from my kitchen).
It’s hard to estimate how much chickens eat because if yours are like mine, they spend a large part of the day eating pasture. But I’ve noticed that when I’m out of town and lock them in the coop all day, they each eat about 1 cup of feed per day (with no extras like kitchen scraps). The only way to tell if you’re feeding enough is by feeling your chickens’ crops every night once they roost and making sure they’re full.
I don’t really know what it’s like to feed such a large flock as yours, but if you switch to fermented feed, remember to put out only enough that your flock will eat immediately. Fermented grains can’t be left in a feeder for days on end… they’ll start to mold or sprout since they’re wet.
Hello, if you’re sealing the jar how is the excess gas from the fermentation process vented?
I don’t tighten the lid completely. I keep the lid on, but loose (just a couple of turns).
ahhhh i was wondering the same thing, you might want to update the article, because i would bet many wont read this far down in the comments, and then wonder why their glass jars exploded, possibly injuring someone, and possibly blaming you, since you emphasized “sealing” the jars to keep out air… an air tight seal is NOT a loose lid…just dont want to see you end up with a lawsuit..