When something is up, your tomato plant will definitely let you know. What were once healthy green leaves may start to turn yellow, splotchy, or crispy as a distress call.
Before you panic, know that yellow leaves are very common on tomato plants and, in most cases, they indicate an underlying problem that’s often easy to fix.
If you’re trying to figure out why your tomato leaves are turning yellow, start here: the eight most common causes of yellowing leaves, how to diagnose what’s going on, and what you can do to help your plants bounce back.
Natural plant development
I’m putting this on the list because it’s likely to be the first time you see yellow leaves on your tomato plant. If the plant is young and healthy but the lowest set of leaves is starting to turn yellow, don’t worry—this is perfectly normal.

The lowest leaves are called cotyledons, or seedling leaves. These slender, leaf-like structures appear after germination and supply the initial nutrients the seedling needs to grow. Once the true leaves develop and start photosynthesizing, the cotyledons are no longer needed so they naturally dry up and fall off.
In my experience, the next set of leaves up (the first true leaves) also tend to yellow over time, as the plant sends more energy to new growth and less energy to these older leaves.
Transplant shock
One of the first signs of transplant shock is yellowing leaves, and it should resolve itself in a couple weeks as the plant establishes roots.
To reduce transplant shock in the future, wait until tomato seedlings are at least 3 to 4 inches tall with a few sets of true leaves before you transplant them, and always harden them off first so they acclimate to their new spot. Transplant on an overcast day or when there’s a string of mild days in the forecast so your tomato plant can ease into the garden.

Temperature stress
Tomato plants are sensitive to both hot and cold temperatures. They’re like the Goldilocks of garden crops, preferring a stable middle ground of 50°F to 85°F.
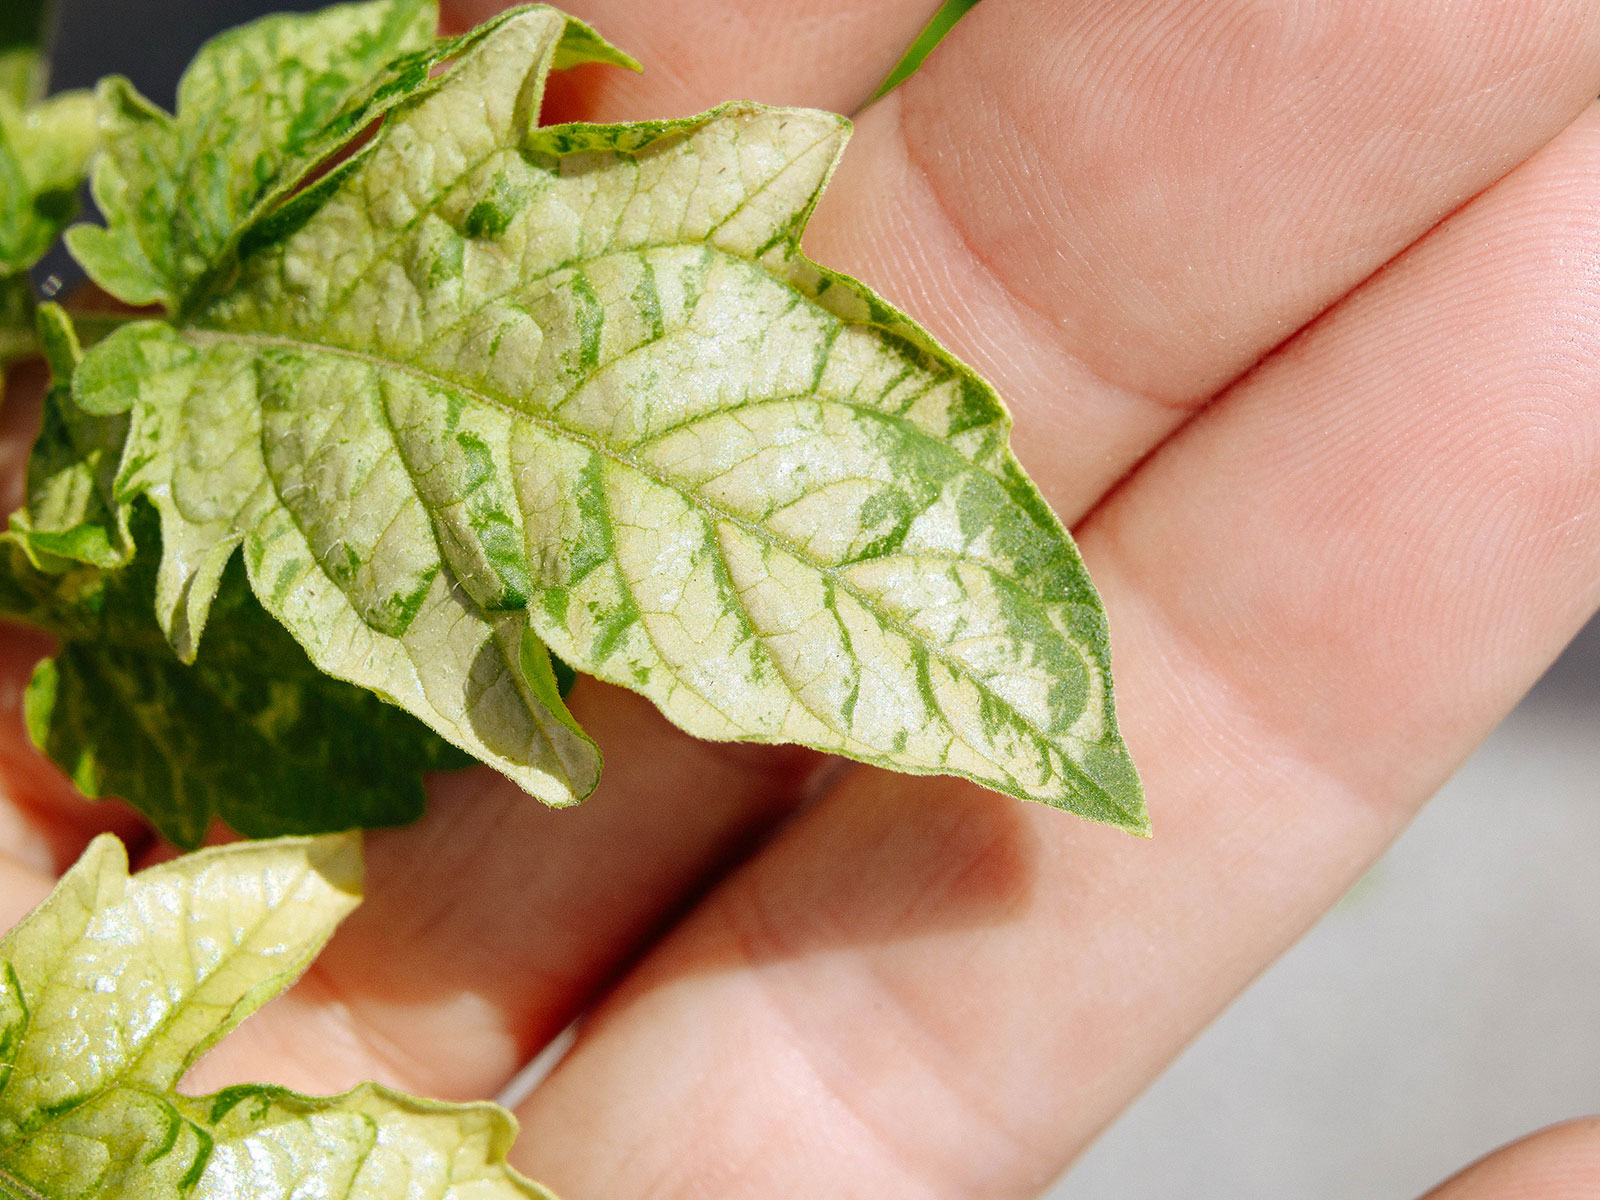
If daytime temps soar above 85°F, heat-stressed tomatoes may end up with scorched leaves that turn yellow or white. If nighttime temps fall below 50°F, the chill slows down nutrient uptake, which can lead to pale or yellowing leaves.
During a heat wave, you can keep your plants healthy and happy by using shade cloth to reduce ambient temperatures. This also helps with other tomato problems like blossom drop and catfacing.
Where I live in Central Oregon, overnight lows usually stay between 43°F and 53°F all summer. I’ve found that growing a short-season tomato variety is key to getting a good harvest when growth slows down in lower temps. These early varieties tend to be more cold-tolerant and will set fruit in cooler weather.
Here’s a list of short-season tomatoes to try growing if you live in a tricky climate.
Quick tip
Should you remove yellow tomato leaves? Generally yes, especially if the leaf has no green left. Severely damaged leaves and stems do nothing for plant growth, so cutting them off helps redirect energy to flowering and fruiting.
Improper watering
How much (or how little) you water your tomatoes can affect their growth. One of the most common causes of yellowing leaves is underwatering, especially in peak summer when your plants are trying to survive extreme heat.
Tomatoes are deep-rooted plants and do best with a good, deep soaking. Depending on your climate and soil conditions, mature plants in the ground (or in raised beds) may only need to be watered two to three times a week, but for longer durations each time.

I try to water long enough so that the top 3 inches of soil is moist—basically a finger’s length. Watering deeply, but less frequently, encourages the roots to grow down in the soil where the moisture is, whereas short sprinkles every day create weak roots that sit near the surface.
If you’re growing tomatoes in containers, they’ll dry out faster than those in the ground and likely need daily watering when temperatures rise.
That said, too much water is also a problem and can lead to root rot and fungal diseases. Tomatoes benefit from the soil drying out slightly before the next deep soak, so try to do a finger check if you have heavy clay soil or there’s been a good rain.
The easiest way to water your tomatoes on auto is by connecting a drip irrigation system to a weather-based irrigation controller. You can use my drip irrigation run time calculator to figure out how long to run your timer for, based on your soil and climate.
Nutrient deficiency
Tomatoes are heavy feeders and yellowing leaves may be a sign of nutrient deficiencies. A lack of soil nutrients (including NPK and trace minerals) can lead to chlorosis, a condition where the leaves turn pale or yellow because they don’t make enough chlorophyll.

You can sometimes pinpoint the missing nutrient by looking at the vein color and the age or location of the affected leaves.
For example, an iron deficiency often shows up in the newest growth on top as yellow leaves with distinct green veins, gradually progressing to entire shoots turning white. You can usually tell when a tomato plant needs more iron as opposed to more magnesium, as a magnesium deficiency affects the older, lower leaves first.
| Nutrient deficiency | Affected leaves | Vein color | Other signs |
|---|---|---|---|
| Nitrogen | Older, lower | Yellow | Purpling, stunted growth, reduced yield |
| Magnesium | Older, lower | Green | Purpling, necrotic spots |
| Potassium | Older, edges | Varies | Necrotic spots, wrinkled leaves, poor yield, uneven fruit ripening |
| Iron | Younger, upper | Green | Very pale or bleached new leaves, slow growth |
| Manganese | Younger, upper | Green | Necrotic spots, stunted growth |
The best way to ensure you’re adding the correct nutrients to your soil is getting a soil test from a reputable lab (especially if your garden is new, you’re unsure about soil quality, or it’s been several years since your last soil test).
I take a simpler approach by building up my soil organically all year long by mulching, composting in place, growing cover crops in the off season, and leaving roots in the soil when I remove spent plants.
Twice a year in spring and fall, I add a couple inches of aged compost to my beds before planting and side dress with an organic all-purpose fertilizer. Sometimes I sprinkle in worm castings. Depending on how my plants look over the season, I might give them a quick boost with a liquid kelp and fish fertilizer.
All of that improves soil texture and supports a vibrant soil food web, which in turn helps water and nutrients move through soil and plant roots more effectively. Organic amendments also lessen the risk of adding too much nitrogen, which can cause yellowing leaves by creating nutrient imbalances.
Read more: How I fertilize tomatoes for big harvests every year
Disclosure: If you shop from my article or make a purchase through one of my links, I may receive commissions on some of the products I recommend.
Recommended products
Tomato diseases
Watering issues, high humidity, and poor air circulation put your plants at risk of various diseases. By the time you notice what’s happening, it’s probably too late.
Tomato diseases have no cure and most cannot be treated at all. That’s why preventive measures are by far the best way to manage diseases in a garden.
Common fungal, bacterial, and viral diseases that affect tomatoes include:
- Early blight
- Late blight
- Bacterial wilt
- Fusarium wilt
- Verticillium wilt
- Septoria leaf spot
- Tomato pith necrosis
- Gray mold
- Leaf mold
- Mosaic virus
- Spotted wilt virus
- Yellow leaf curl virus
Many of these diseases are often mistaken for each other, since there can be overlap in their symptoms (like wilting, brown spots, and fruit loss).
You can sometimes treat early blight, late blight, or septoria leaf spot with copper fungicides if you catch them early, but the standard course of action for infected plants is to remove them entirely (including the roots) and throw everything in the trash (not the compost) to reduce spread to healthy plants.

Once the infected plant is gone, work on improving the conditions in your garden:
- Prune tomato plants to increase air flow
- Avoid overhead watering, especially if leaves won’t dry before nightfall
- Apply mulch to prevent water from splashing back onto the leaves
- Clean up plant debris at the end of the season and discard diseased foliage
- Rotate crops the following year
- Clean gardening tools that were used on infected plants
You can also grow disease-resistant tomato varieties like Roma VF (which resists fusarium and verticillium wilts) or Iron Lady F1 (which resists early blight, late blight, septoria leaf spot, and fusarium/verticillium wilts).
Here’s a guide to help you figure out which terms and acronyms to look for in seed catalogs.
Pest damage
Take a closer look at your tomato plant, especially the underside of the leaves. Do you see any fine webbing, stickiness, or tiny insects?

Sometimes stippling and leaf bronzing is a sign of mites and aphids, which feed on plant sap and drain vital nutrients from the leaves. Severe infestations can cause entire leaves to turn yellow, curl upward or downward, dry up, and eventually die.
But catch these pests early and you can usually get them under control before they do too much damage:
Natural aging
Coming full circle from those first yellowing leaves (the cotyledons), it’s now the end of the season and 100 percent expected for the oldest leaves to start dying off.

Leaves exist to feed your tomato plant so it can reproduce, and once it’s successfully set fruit, its job is done. If you see entire branches turning yellow or brown at the end of summer, know that this is a natural part of the tomato plant’s lifecycle.
You can simply cut off those dead leaves or branches so the plant can redirect its remaining energy to ripening fruit.